Last updated: September 10, 2026
Key Takeaways
- Many service contracts and local rules expect documented visits every 3 to 4 months, but the exact interval depends on your design and jurisdiction.
- Use a lint filter if your unit has one and clean it on the interval in the manual, often every 1 to 3 months.
- A generic septic article often gets this wrong by treating aerobic systems like ordinary septic tanks; consult a licensed septic professional if your setup is unclear.
- An aerobic unit has moving parts, electrical components, and sometimes a spray pump or pressure line downstream, so consult your system manual or a licensed professional before opening anything.
- For a homeowner following an aerobic septic system maintenance checklist, the safest approach is regular observation and documented service rather than guesswork.
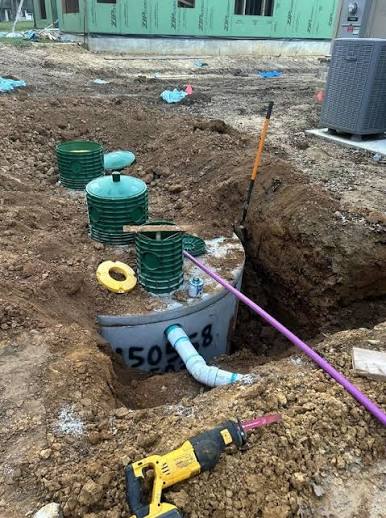
A blower humming in the backyard, a lid that should stay shut, and a service log on the kitchen counter — that is the real picture here. Not glamour. An aerobic septic system maintenance checklist for homeowners keeps the unit treating wastewater the way it was designed to, and the basic routine is plain enough: keep the air pump running, protect the chlorine contact chamber if your system uses one, watch for alarms and odors, and schedule service before small problems turn into a backup or a failed inspection. For the most reliable interpretation of your setup, consult the installer’s manual or a licensed septic professional.
Who this checklist is for, and what it assumes

This checklist is for a homeowner with a residential aerobic treatment unit, often called an ATU: a septic system that uses oxygen and mechanical aeration to speed up treatment. I’m assuming you already know where your control panel is, where the lids are, and whether your system includes a spray field, drip field, or a final disinfection step such as chlorine tablets or ultraviolet light. I’m also assuming you have the basic owner tasks covered by your county permit or installer’s manual, not a generic gravity-tank system; if not, consult a licensed septic professional before you proceed.
Not the right DIY job? Correct. This is not the right DIY job if the alarm is sounding continuously, sewage is surfacing in the yard, effluent is backing into the house, or you see electrical damage at the control box. Those are not “maintenance” issues; they are failure signals. The same is true if you do not know which compartment is which, or if the system has been altered from the original design. In those cases, the safe move is to stop and get a licensed septic contractor or the service provider listed on your permit.
For everyone else, the good news is that most homeowner maintenance is visual, routine, and calendar-based. You do not need to disassemble the aerator or start guessing at wastewater chemistry. What you do need is a predictable checklist and the discipline to keep it on a 30-day, 90-day, and annual schedule. On many ATUs, missing one small task for a few months is how you end up paying for a pump truck, a blower replacement, or a field repair that could have been delayed. Ugly bill. Fast.
What an aerobic septic system needs to stay healthy
Four things, basically. Air has to move, liquid has to stay where it belongs, disinfectant has to be there if the design uses it, and the spray or drip disposal area cannot be overloaded. The machine side does the work; your job is to make sure it does not slip out of range quietly.
The main terms matter here. The aerator is the blower or compressor that pushes air into the treatment tank, according to the system design and manufacturer instructions; if you are unsure, consult a licensed septic professional. The clarifier is the chamber where solids settle before partially treated water moves on, in systems designed with that stage; again, check the manual or a pro. The chlorine contact chamber is the compartment that holds disinfectant long enough to reduce pathogens before dispersal. The effluent is the treated liquid leaving the unit, as defined by the system’s design and local rules.
A generic septic article often gets this wrong by treating aerobic systems like ordinary septic tanks. They are not the same. A conventional tank can tolerate more passivity because it relies mostly on gravity and settling. An aerobic unit has moving parts, electrical components, and sometimes a spray pump or pressure line downstream. That means a dead blower, a missing chlorine tablet, or a tripped breaker is not a minor inconvenience; it changes treatment performance.
I would keep a simple home log with three fields: date, observation, and action. A notebook or a phone note is enough. If your county requires service records, keep those with the permit paperwork. Many service contracts and local rules expect documented visits every 3 to 4 months, but the exact interval depends on your design and jurisdiction. If your permit or manufacturer manual says quarterly inspection, follow that, not a neighbor’s schedule.
Aerobic septic system maintenance checklist: the steps I would follow

A practical checklist starts with a monthly walk-through and ends with a yearly service review. The point is to catch the things a homeowner can catch without opening the wrong lid or reaching into wastewater.
- Check the control panel and alarm light. Look at the panel once a month and test the alarm only if your manual says there is a test switch. Verify that power light, pump light, and aerator light match the normal pattern in your owner’s manual. If the alarm is active, or the breaker has tripped more than once, that points to a blower, float, or electrical fault.
- Listen to the aerator for steady operation. Stand close enough to hear whether the blower sounds continuous and even, not cycling, rattling, or straining. Verify that you hear normal airflow and no grinding or metallic knock. A sudden silence, hot motor housing, or buzzing without airflow suggests a failing compressor or blocked line.
- Inspect the chlorine or disinfection stage, if your system has one. Open only the access point designated for homeowner checks. Verify that chlorine tablets are present if your manual calls for tablets, that the holder is not bridged or damp-packed, and that the chamber is not empty. A missing supply, slimy buildup, or a crusted tablet feeder means the disinfection step is not doing its job.
- Look for water where it should not be. Walk the tank area, spray heads, and down-gradient yard after dry weather. Verify that there is no surfacing effluent, no soggy soil over the tank, and no ponding around the disposal area. Persistent wetness, a sewer smell, or green growth in one patch can signal hydraulic overload or a clogged line.
- Watch the spray pattern or distribution area. If the system sprays, observe from a distance during a cycle. Verify that heads are rising, rotating if designed to rotate, and covering the intended area without mist blowing onto a driveway, fence, or roof. A weak arc, constant dribble, or misdirected spray usually means a clogged nozzle, low pressure, or pump trouble.
- Keep solids out of the system. Use a lint filter if your unit has one and clean it on the interval in the manual, often every 1 to 3 months. Verify that drains are not receiving wipes, grease, cigarette butts, cat litter, or paint rinse. If the filter plugs quickly or the sinks gurgle, solids management is slipping.
- Confirm accessible lids, risers, and venting stay secure. Check that lids are latched or bolted, risers are intact, and vents are unobstructed. Verify that children, pets, and pests cannot enter. A cracked lid, loose cover, or blocked vent can create a safety hazard and interfere with airflow.
- Record service dates and pump-outs. Note the date of each inspection, filter cleaning, service call, and pump-out. Verify that the last full pump-out was done on the interval recommended by the installer or service provider, often every 2 to 5 years depending on usage and tank size. If you cannot remember the last pump-out, treat that as a maintenance gap, not a small detail.
A good result looks boring: no alarms, no odors, no wet spots, no trickling sounds, and no unexplained power trips. A bad result is often quieter at first than people expect. An ATU can still “run” while treating poorly, especially if the blower is weak or the disinfectant stage is empty. That is why the checklist has to be mechanical, not just visual.
How often should you inspect an aerobic septic system?
Monthly, quarterly, annual. That is the cleanest answer, and the honest one, because aerobic systems are not all built to the same standard, and local rules can be stricter than the owner manual.
A monthly walk-through is for the things you can see and hear without opening much: alarm status, blower sound, obvious wet spots, and spray performance. A quarterly visit is the right time to clean filters, verify disinfectant supply, and review whether the system has developed any odor, sludge carryover, or nuisance spray problems. Annual service is when a qualified technician should evaluate the blower output, floats, timer settings, electrical components, tank levels, and sludge accumulation.
Usage changes the schedule too. A house with frequent guests, a garbage disposal, or large laundry loads puts more solids and water through the system than a lightly used second home. A small cabin used on weekends may need different attention than a full-time residence, even if both use the same brand of ATU. I would never assume one calendar fits every property.
For edge cases, the schedule changes. If the system serves a rental, a home daycare, or a property with more than one bathroom running at once, the inspection rhythm should be tighter. If the site has clay soil, a high water table, or a spray field near a slope, then drainage and distribution checks matter more because the disposal area has less room for error. If your system uses ultraviolet disinfection instead of chlorine, the lamp and sleeve cleaning become part of the regular routine, and that is not optional.
The honest trade-off here is that tighter maintenance takes time. A well-kept ATU asks for more attention than a simple gravity septic tank. If you want lower effort, an aerobic system is the wrong model to hope for. Convenient? No. Reliable? Usually, yes.
When should I stop troubleshooting and call for service?
Stop immediately when the system starts showing electrical, hydraulic, or treatment failure. Those are not “wait and see” problems, because delay can damage the unit and the drainfield or spray field.
The alarm is sounding continuously: This usually means a power loss, float problem, high water level, or aerator failure — shut off unnecessary water use and call for service the same day.
Sewage is backing up inside the house: The system is not moving effluent as designed — stop using water fixtures and arrange urgent service or pump-out if instructed by the technician.
Effluent is surfacing in the yard or flowing where it should not: The disposal area is overloaded, blocked, or failed — keep people and pets away and get qualified help quickly.
The blower is silent, hot, or tripping the breaker repeatedly: The aerator or its circuit may be failing — do not keep resetting the breaker; that can worsen electrical damage.
The spray field smells strong, mists excessively, or hits hard surfaces: The system may be underperforming or misadjusted — stop trying to tune nozzle issues if you do not have the design specs.
There is heavy sludge, scum carryover, or black liquid in the wrong chamber: Solids are moving where they should not — a service visit and likely pump-out are needed before downstream damage spreads.
If you are unsure whether a symptom is cosmetic or structural, I would treat it as structural. One service call is usually cheaper than replacing a blower, float assembly, or a saturated disposal area. Well, usually cheaper.
The mistakes people actually make, and what they cost
The most common mistake is treating the system like a set-and-forget appliance. That leads to a dead blower, an empty disinfectant chamber, or an overloaded spray area that fails slowly. The correct alternative is a dated checklist with monthly and quarterly checks.
A second mistake is overusing water to “flush the system.” Long laundry days, repeated bath loads, or leaking toilets can push too much water through an ATU. The consequence is hydraulic overload, which weakens treatment and can send partially treated effluent to the disposal field. The correct alternative is to fix leaks, spread laundry across the week, and avoid concentrated water use.
A third mistake is adding the wrong chemicals. People sometimes pour drain cleaners, bleach in large doses, paint water, or solvents into the system because they think stronger is cleaner. That can injure the biological treatment process and corrode components. The better move is to keep harsh chemicals out and use only ordinary household cleaning in moderate amounts.
A fourth mistake is neglecting filters and lids. A clogged effluent filter or loose access cover seems small until solids back up or a child has access to the tank area. The consequence can be odor, poor flow, or a safety issue. The alternative is simple: inspect and clean what your manual tells you to, and keep all lids secured.
A fifth mistake is assuming a quiet system is healthy. Some failures are silent until the alarm or the field gets wet. The correct alternative is to verify airflow, alarm lights, and spray behavior rather than relying on noise alone.
I would be most cautious with systems that have been modified, expanded, or repaired by multiple contractors over time. Those are the ones where the paperwork matters as much as the hardware. If the original design is missing, do not guess the maintenance interval.
What changes in winter, at a vacation home, or on a problem site?
The standard checklist still applies, but the schedule and access plan need to change when the site is not used normally. Winter matters because frozen lids, shallow lines, and idle spray components can hide problems until thaw. I would inspect before a cold snap, not after a freeze breaks something. On vacant homes, a 2- to 3-month gap without a look-in is too long if the system remains powered and active; alarms can fail unnoticed.
At seasonal properties, the first week of reopening is critical. Run water gradually, confirm the aerator starts, and watch for delayed alarms or surfacing water after several cycles. A dormant system can expose weak floats, dried seals, or a clogged nozzle as soon as usage resumes.
On sites with high groundwater, steep slopes, or compacted soils, the disposal area deserves extra attention. If the soil stays wet after ordinary use, the field may be near its limit. The right response is not more water or more disinfection tablets; it is reducing load and getting a service evaluation. Spray systems near property lines also need drift control. If mist reaches a neighbor’s fence or paved surface, that is a design or adjustment problem, not a cosmetic issue.
A lot of generic advice ignores these edge cases and treats every yard like level, sandy ground with year-round occupancy. That is not how real properties behave. The system has to fit the site, and the maintenance has to fit the use pattern.
Aerobic septic system maintenance checklist comparison and spec table
| Task | Typical homeowner cadence | What to verify | Source / note |
|---|---|---|---|
| Alarm and control panel check | Monthly | Normal lights, no continuous alarm, no repeated breaker trip | Installer manual or EPA septic guidance |
| Aerator/blower listening check | Monthly | Steady airflow, no grinding, overheating, or silence | Service provider instructions |
| Disinfection stage | Quarterly | Tablets or UV components present and functional | Local permit conditions |
| Filter cleaning | 1 to 3 months, if installed | Filter not clogged, sinks draining normally | Owner’s manual |
| Pump-out | Every 2 to 5 years | Sludge level and tank capacity | Installer or contractor recommendation |
| Qualified service visit | Every 3 to 4 months in many programs | Blower output, floats, timer, tank levels | Permit, contract, or local rule |
For many homeowners, the comparison is straightforward: an ATU needs more frequent attention than a conventional gravity septic tank, but that extra attention is usually predictable. If you want a system that tolerates long stretches of neglect, an aerobic setup is not the right expectation. If you want faster treatment and are willing to follow a checklist, the trade can make sense.
Aerobic septic system maintenance checklist FAQs
How often should I look at my aerobic septic system?
Once a month is the minimum practical homeowner check, with quarterly service or inspection depending on your permit and manual.
Can I do the maintenance myself?
You can do the visual and routine checklist items, but anything involving electrical faults, persistent alarms, backups, or surfacing effluent should go to a licensed septic professional.
Do I need to add chlorine tablets?
Only if your system uses a chlorine disinfection stage and your manual says tablets are required. If the unit uses a different process, follow that design instead.
What is the biggest warning sign?
A continuous alarm, backup inside the house, or wet effluent in the yard are the clearest signs that you should stop troubleshooting and call for service.
How do I know if I need a pump-out?
If you cannot remember the last pump-out, or if a contractor says sludge is high, treat that as a pump-out trigger rather than waiting for a failure.
Bottom line
A homeowner can keep an aerobic septic system in good shape by following a simple aerobic septic system maintenance checklist: check the panel, listen to the blower,