Last updated: September 10, 2026
Key Takeaways
- Simple on paper. Not in service.
- The liquid side and the mechanical side are tied together.
- A generic article often treats these as separate categories; in practice, consult a qualified technician or engineer if the equipment is safety-critical, and check guidance from the manufacturer and OSHA/NIOSH where relevant.
- One system, really.
- A horizontal pump on a baseplate may suffer from soft foot, coupling misalignment, or seal flush problems.
A pump, an aerator, and the surrounding hardware can look straightforward from ten feet away. Then the unit starts shaking. This pump, aerator, mechanical components — complete guide is for someone who needs to maintain, troubleshoot, or specify this kind of equipment, not for someone shopping by brand. In a typical plant, one wrong alignment can cut seal life by months, not days.
Who this is for — and what I am assuming you already know
Anyone working with a small utility pump, a process pump, a pond or tank aerator, or a combined pumping and aeration setup where the mechanical side matters more than the brochure can use this. I am assuming you already know the difference between a motor and the driven equipment, can identify a suction line and a discharge line, and can read a nameplate. I am also assuming you have the basics: the correct voltage, access to the unit, a way to isolate power, and the ability to open covers, inspect parts, and tighten fasteners without improvising.
What this guide is really about is the part most generic articles skip: the mechanical chain between power and liquid movement. Shaft. Coupling. Seal or packing. Bearings. Impeller or rotor. Housing. Any air-diffusion or mixing hardware attached to the system. If one of those parts is wrong, the whole unit may still spin, but it will move the wrong amount of fluid, draw too much current, or fail early.
Not for a quick outside-only fix. No shutdown, no inspection, no cleanup. A pump that has lost prime, a mechanical seal that is leaking badly, a bearing that is running hot, or an aerator with a broken diffuser line usually needs the unit opened up. If the equipment is on a live process line, in a confined space, handling hot fluids, corrosive liquids, sewage, or a critical water supply, I would not treat it as a casual DIY job; consult the equipment manual and a qualified professional before opening it. OSHA’s confined-space standard and manufacturer service instructions are the right starting points in those cases.
Here’s the plain rule: if the problem is electrical at the supply, a control fault, or a failure inside the pump end, guesswork will not carry you far. But if it is a dirty screen, a clogged intake, a loose hose clamp, or an air leak on an accessible suction line, that is often within reach of a careful owner or technician. Easy? Sometimes. Not always.
What a pump, aerator, and mechanical component set actually does
A pump moves fluid by creating pressure difference; an aerator adds oxygen, mixing, or gas transfer; the mechanical parts keep both jobs stable under load. That sounds simple. It hides the real issue: the liquid side and the mechanical side are coupled. A small restriction at the suction, a bent shaft, or a worn impeller can change flow enough to make the motor work harder, and a bad bearing or seal can make a healthy hydraulic section fail.
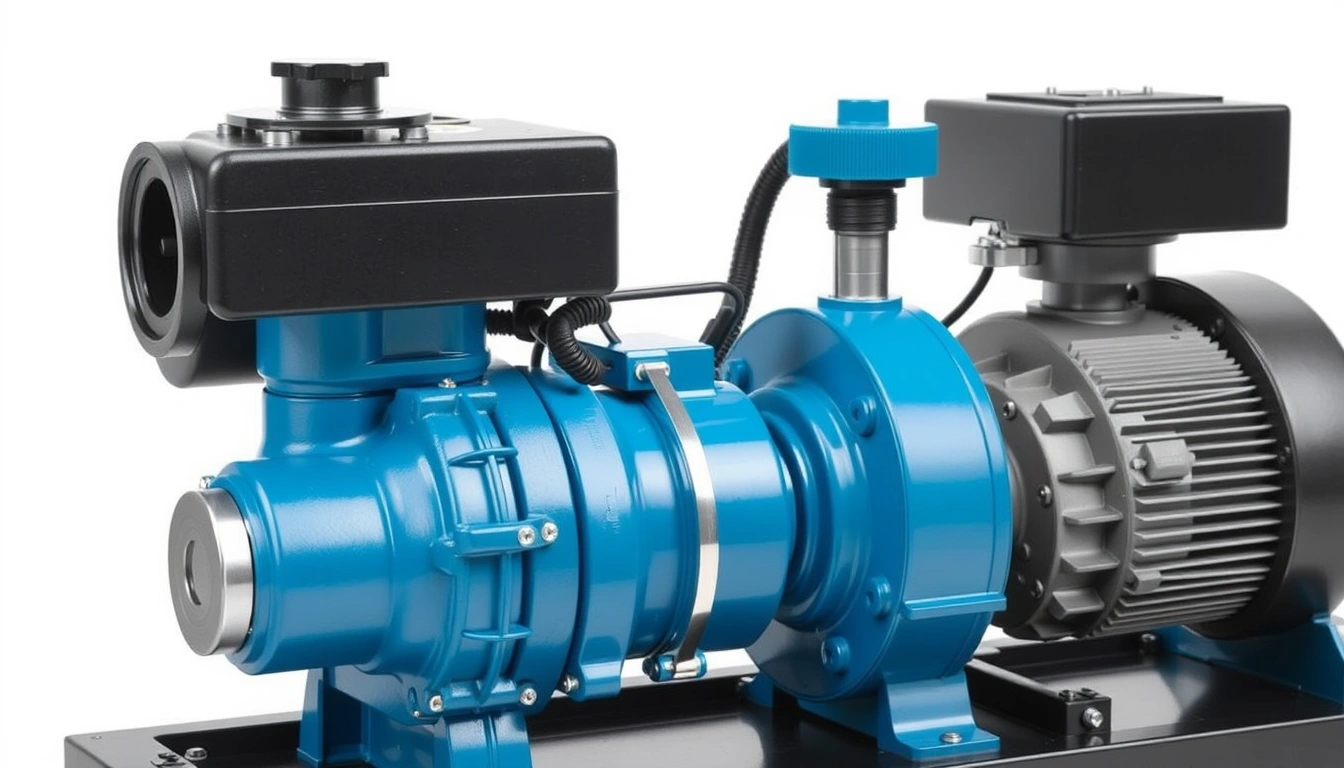
The terms matter. A centrifugal pump uses a spinning impeller to accelerate liquid outward and convert velocity to pressure in the volute or casing. A positive displacement pump traps a fixed volume and pushes it forward; it is less forgiving of blocked discharge and often more sensitive to pressure relief requirements. An aerator may be a surface mixer, a blower-fed diffuser system, or a submerged unit that combines circulation with gas transfer. Mechanical components are the parts that transmit force or contain the fluid: bearings, couplings, shafts, seals, gaskets, wear rings, impellers, casings, O-rings, and fasteners.
A generic article often treats these as separate categories; in practice, consult the maker’s manual and a qualified professional when the service is high-risk, because the seal, bearing, and hydraulic side can affect one another. A mechanical seal is not just a leak point; it is a heat-generating interface that depends on correct flush, alignment, and cleanliness. Bearings are not just support parts; they determine whether the shaft stays centered enough for the seal faces to stay in contact. An aerator diffuser is not just an air outlet; its hole pattern, fouling rate, and backpressure affect blower load and oxygen transfer. If the system is underspecified, the first symptom may be noise, vibration, or poor output long before it fails completely.
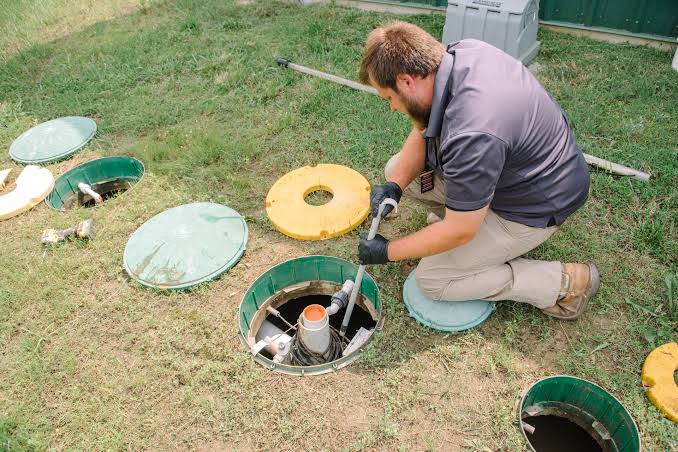
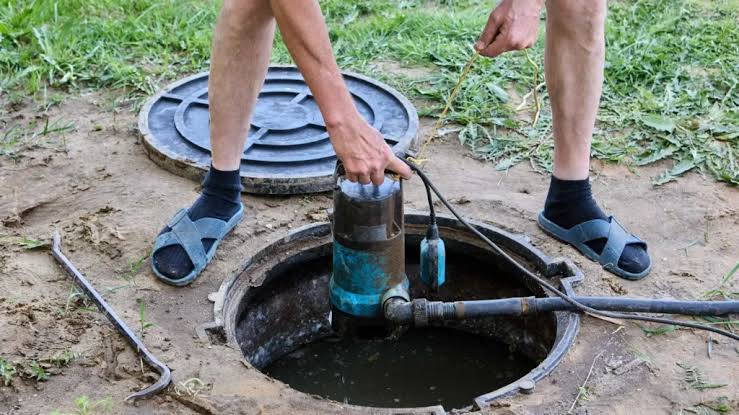
Different layouts fail differently. End-suction centrifugal pumps, submersible pumps, vertical multistage units, and surface aerators do not share the same weak points because their loads are not the same. A horizontal pump on a baseplate may suffer from soft foot, coupling misalignment, or seal flush problems. A submersible unit more often fights ingress, cable damage, and bearing wear from contaminated liquid. An aerator in a dirty basin may fail because solids wrap the impeller or because diffuser pores clog with biofilm and mineral scale.
Think of it as more than “spin thing, move liquid.” That shortcut misses the expensive part: friction, alignment, cavitation, seal life, and fouling. Those are the real subjects. One worn seal can waste gallons each hour, and one misaligned coupling can shorten bearing life by months. That math stops working fast.
How the system works, step by step
Start at the power source, then move to fluid output, then circle back through the wear points. That order shows where failure begins instead of where it ends. I would trace it in this order every time.
- Verify the drive source and rotation direction. Confirm the motor nameplate voltage, phase, and frequency, then check the rotation arrow on the pump or aerator housing. A brief bump test tells you the actual direction before full run; on three-phase motors, reverse two leads if direction is wrong. Wrong rotation can cut flow sharply and overheat a centrifugal pump within minutes. A problem sign is low discharge, abnormal sound, or current that does not match expected load.
- Check the suction path first. Open the suction isolation valve fully, inspect strainers, foot valves, and intake screens, and confirm the suction line is filled where the design requires it. For flooded suction, the liquid level must stay above the pump centerline by the amount specified for the installation; for self-priming units, the priming chamber must be filled to the marked level. If the pump cannot maintain prime, air is getting in or the suction lift is too high. A problem sign is gurgling, unstable pressure, or repeated loss of prime.
- Inspect the impeller or rotor condition. Shut down, isolate, and open the pump end far enough to view the impeller vanes, wear rings, or rotor. Look for erosion, broken vanes, wrapped debris, scale, or a rubbing mark at the casing. Verify the impeller clearance against the manufacturer’s specification if available; excessive clearance reduces efficiency and can prevent priming. A problem sign is metal dust, plastic shavings, or a polished rub line inside the casing.
- Measure shaft and bearing condition indirectly first. Rotate the shaft by hand if the design allows it and feel for roughness, tight spots, or end play. Check bearing temperature after a normal run; a housing that becomes too hot to keep a hand on usually points to lubrication, misalignment, or bearing wear. Verify that coupling guards and fasteners are secure before restarting, and have a qualified professional review anything that is unclear. A problem sign is a grinding feel, a cyclical noise every revolution, or vibration that changes with speed.
- Confirm seal integrity. Identify whether the unit uses a mechanical seal, lip seal, or packing. A mechanical seal should show no visible leakage except a trace during startup on some designs. Packing may allow a small drip, because it depends on controlled leakage for lubrication. Verify flush water, seal chamber cleanliness, and gasket seating. A problem sign is a steady drip at the seal face, white crust from dried fluid, or heat around the seal chamber.
- Check alignment and coupling condition. Inspect the coupling element, keyway, set screws, and mounting bolts. On baseplate-mounted pumps, verify that soft foot is absent by checking whether all feet sit flat before tightening; on flexible couplings, the element must not be cracked or collapsed. Even modest misalignment can destroy bearings and seals early. A problem sign is coupling dust, vibration at the bearing housings, or recurring seal failure after replacement.
- For aerators, verify air delivery or mixing pattern. If the aerator uses diffusers, confirm that air is distributed evenly and that backpressure is not unusually high. If it is a surface aerator or mixer, look for the correct swirl, plume, or circulation pattern rather than dead zones. A diffuser line clogged by biofilm, lime, or sediment can make the blower work harder while delivering less oxygen. A problem sign is uneven bubbling, loud hissing from one zone, or a basin area that stays stagnant.
- Run under load and compare behavior to normal. After reassembly, run the unit for a short period and verify pressure, flow, current draw, and sound. You do not need a laboratory; you need consistency. A healthy pump usually has steady pressure and a smooth sound, not pulsing or surging. A problem sign is hunting pressure, current above nameplate expectation, or vibration that appears only once liquid is moving.
That sequence matters because it separates causes from effects. A noisy bearing may be the result of a seal leak, and a bad seal may be caused by misalignment, not seal quality. Skip straight to “replace the leaking part,” and you often pay twice.
What should I check before I start taking parts apart?
Check the operating condition, the installation, and the history before you remove a single bolt. Many “mechanical failures” are really system problems in disguise, and they come right back after a swap.
Start with the nameplate and the duty point. If the pump is running far from its intended flow and head, the mechanical parts are being asked to survive a load they were not sized for. A centrifugal pump selected for 20 m of head will not behave well if the system is forcing it into a much higher resistance curve. The same is true of an aerator: a diffuser system sized for a certain air volume and submergence depth can be starved if the blower is undersized or the line is fouled.
Then look at the installation geometry. A suction line with too many elbows, a reducer in the wrong orientation, or a lift that is too high invites cavitation. Cavitation is the formation and collapse of vapor bubbles in a low-pressure zone; it erodes impellers and makes a pump sound like gravel is inside it. If you hear that, the impeller may be damaged, but the root cause is often suction conditions, not the metal itself.
Check the obvious external parts: valve position, clogged strainers, loose clamps, cracked hoses, broken mounts, and missing coupling guards. People love to chase the expensive hidden part while the trouble sits in a 20-cent seal lip or a half-closed valve. Ugly, but common.
I would also note fluid properties. Thick sludge, abrasive slurry, grit, fibers, oil, and corrosive liquids change what “normal wear” means. A clean-water centrifugal pump and a wastewater pump do not fail the same way. In wastewater service, ragging around the impeller is common. In abrasive service, wear rings and impeller edges erode. In hot service, seal materials and gasket choice matter. If the liquid changed and the pump did not, the system may be mismatched rather than broken.
Finally, check the past failure pattern. If the same seal fails every few months, I would suspect alignment, shaft runout, or seal flush problems before I suspect bad luck. If bearings keep going, I would look for over-tensioned belts, poor lubrication, or contamination. Repeating failures are usually telling you which diagnosis is wrong.
When should I stop and get qualified help?
Stop when the problem involves hazardous liquid, critical service, confined access, or evidence of internal damage that could become worse with more disassembly. This is not a polite warning; it is the point where the wrong move can make the job unsafe or much more expensive.
Hot liquid or steam service: The casing, seal chamber, and piping can hold pressure and heat — isolate, cool, and have a qualified technician handle the opening if temperature or pressure is uncertain. OSHA and the equipment maker’s instructions are the right references here.
Corrosive, toxic, or sewage-containing fluid: Exposure risk is real and cleanup can be regulated — stop and use proper containment, PPE, and site procedures instead of opening it casually.
Repeated seal failures after replacement: The fault is probably not the seal itself — check shaft runout, alignment, and flush plan; if you cannot verify those, escalate.
Severe vibration or a shaft that will not turn freely by hand: A bearing, rotor, or impeller may be damaged — do not force it, because you can break the shaft or scar the housing.
Electrical fault at the motor or control gear: If the breaker trips, insulation smells burnt, or the starter chatters, the issue is upstream of the pump end — shut it down and have the electrical side checked by someone competent in motor controls.
Submersible or sealed unit with water ingress: The insulation and internal bearings may already be compromised — further running can destroy the unit and create an electrical hazard.
Confined space, deep tank, or awkward access: A simple mechanical job can become an access and rescue problem — do not treat it like a bench repair; consult a confined-space procedure and qualified personnel.
Critical process or public supply service: If the equipment supports fire protection, drinking water, or a production line with expensive downtime, a wrong diagnosis costs more than a service call — keep the unit within the site’s maintenance procedure.
Ignore those situations and you usually get one of three outcomes: injury, contamination, or a second failure after the first repair. I would rather see a reader stop early than open a unit in the wrong condition and turn a mechanical issue into a site incident.
The mistakes people actually make, and what they cost
The most common mistake is changing the wrong part. People replace a seal when the real issue is misalignment or shaft wear. The consequence is a leak that returns almost immediately. The better alternative is to check shaft condition, coupling alignment, and bearing play before installing the new seal.
A second mistake is ignoring suction-side problems. A pump can sound “bad” because it is starving, not because the impeller is ruined. The consequence is cavitation damage, reduced flow, and wasted parts. The correction is to inspect the suction line, intake screen, liquid level, and valve position before tearing down the pump end.
A third mistake is over-tightening fasteners, especially on seal housings, bearing caps, and flange joints. The consequence is distorted faces, crushed gaskets, warped covers, or a seal face that no longer runs square. The correct alternative is to tighten in sequence and to the specified torque where a manufacturer gives one; if no torque is available, tighten evenly and stop when the joint seats.
A fourth mistake is assuming all aerators fail in the same way. A diffuser clog and a surface mixer motor issue look similar from a distance, but they are not solved the same way. The consequence of the wrong diagnosis is a wasted blower service when the real issue is fouled membrane diffusers, or a rotor replacement when the basin circulation pattern is the problem. The correction is to identify the aerator type first: surface, fine-bubble diffuser, coarse-bubble diffuser, jet, or mechanical mixer.
A fifth mistake is running the unit “just to see.” That can burn a seal, overheat a bearing, or worsen cavitation within minutes. If the unit has a known mechanical symptom, I would shorten the test run and watch current, sound, and temperature closely. A problem that appears only under load is still a problem.
A sixth mistake is cleaning aggressively with the wrong tools. Scraping impeller surfaces with steel tools, sanding seal faces, or nicking a gasket surface creates new leakage paths. The consequence is a repair that looks finished but fails on restart. The correct alternative is soft cleaning, approved solvents, and inspection under light before reassembly.
Pump and aerator edge cases that change the method
The standard method needs modification when the liquid is unusual, the installation is unusual, or the duty cycle is unusual. I would never treat these as trivial variations because they change the mechanical life of the unit.
If the fluid contains grit or sand, the impeller and wear parts matter more than the seal alone. Abrasive solids erode clearances and shorten the time between rebuilds. In that case, I would pay close attention to wear rings, impeller edge condition, and whether the pump type is suited to solids passage. A standard clean-water pump may simply be the wrong tool.
If the liquid is viscous, flow falls and motor load can rise in ways that confuse a quick diagnosis. A pump that seems underperforming may be operating exactly as physics predicts with a thick fluid. The adjustment is to compare against the manufacturer’s viscosity correction or application guidance rather than against clean-water expectations.
If the pump or aerator cycles on and off often, thermal and mechanical stress increase. Frequent starts can punish bearings and couplings, and in some motor setups, they also raise electrical wear. The modification is to check control logic, tank level settings, and whether the system needs a larger vessel or a different control band, not just a stronger part.
If the unit is mounted on a poor base, vibration may come from the foundation rather than from internal wear. Soft foot, uneven grout, bent piping loads, or pipe strain can distort the casing. The correction is to relieve pipe stress, level the base, and verify alignment with the piping disconnected if necessary.
If the aerator is in cold water, oxygen transfer and air line behavior shift. Ice, condensation, and changes in air density can affect performance. That means the same blower settings may not produce the same mixing pattern across seasons. I would check for line drainage, icing points, and whether the diffuser pattern is still uniform.
If the application is intermittent rather than continuous, corrosion and sticking can show up after idle time. A seal that sits